Creating and Editing Text Clippings
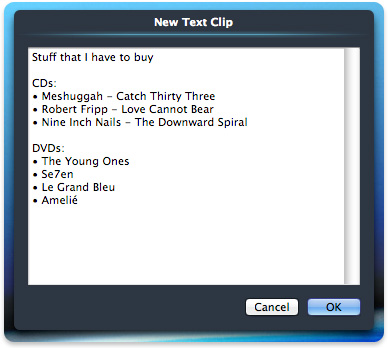
You can quickly create a new text clipping by clicking an empty bin. Doing so opens a dialog that enables you to type the text of the clipping.
(You can change the clicking behavior in the Hot Click preferences.)
creating a text clipping
To edit an existing clipping, either choose Edit Clip Text… from the Action button next to a text clipping or open the preview window (e.g. by hovering with the mouse over the bin, see Hot Key preferences) and click into the text there.
Copying Text from All Clip Bins
You can conveniently copy the text from all the clip bins in the current clip set to the Clipboard. To do so, choose Copy Text from All Bins from the Edit menu. Each copied clipping will be on a separate line. A handy shortcut for doing this is to press the Shift (⇧) and Option (⌥) keys while clicking any enabled Paste button.
Please note that only the plain text content of each clipping will be copied — any formatting that the clippings have will be ignored. Also, the text will only be copied to the Clipboard and not automatically pasted to the current application.
Pasting Text to Multiple Clip Bins
Similar to copying text from all clip bins, you can also paste a block of text from the Clipboard to multiple clip bins. To do so, choose Paste Text to Multiple Bins from the Edit menu. Each individual line of the text will be put into a separate clip bin starting with the next bin after the last occupied bin. Clip bins will be added to the current clip set if there aren't enough to hold all the clippings.
You can also paste text to multiple clip bins by pressing the Shift and Option (⌥) keys while clicking any enabled Copy button. Using this method, the clip bins will be filled starting with the bin that the clicked Copy button is associated with. The contents of that clip bin and any after it may potentially be replaced by using this method.
Please note that only the plain text content of the clipping will be pasted — any formatting that the clipping has will be ignored. Also, the text will only be pasted from the Clipboard and not automatically copied from the current application.
Sharing Clippings (Export, Import)
You can save either single Clippings or entire Clip Sets to disk using the Export commands. This allows you to archive specific clippings or even share them with other users or computers.
- To export a single Clipping choose Export to Disk… from the bin's Action button. This creates a package file with the name ending in ".iclipping".
- To export a Clip Set choose Export Clip Set… from the Edit menu. This creates a package file with the name ending in ".iclipset" containing all clippings of the current clip set.
These so-called package files are actually folders, and you can look inside them by ctrl-clicking on them, then choosing Show Package Contents from the contextual menu. This is especially useful for the Clip Set packages, allowing you to pick single items out of them. Alternatively, you may rename the file by removing the .iclipset extension from it to treat it as a normal folder.
To re-import these saved clippings and clip sets you have several options:
- Double clicking a ".iclipset" files creates a new clip set from it.
- Double clicking one or more ".iclipping" files adds them to the end of the current clip set. If the clip set is full, the clippings get added to a "Overflow" clip set, which will be created as needed. However, if the current clip set is the Recorder, the clippings will simply be inserted at the front of the Recorder's clip set, as if they were newly recorded clipboards.
- Single ".iclipping" files can be dragged from the Finder and dropped into a clip bin.
- One or more ".iclipping" files can also be dragged onto the Add Clip Bin button (+) button at the end of the iClip window. This has the same effect as opening the files in the Finder (e.g. by double clicking them).
A note for the curious: When looking into ".iclipping" packages, you'll find the various representations of clipboard data as separate files inside. For instance, a clipping of a Safari web page will show the web page content in many forms, e.g. as a Webarchive, RTF and plain text.
Sharing Clippings between Multiple Computers using Dropbox and similar Cloud Sharing services
If you have a 3rd party cloud file sharing service, such as DropBox, Google Drive or Microsoft OneDrive installed, you can have your Clippings database synchronized between your computers by placing the iClip Clippings.iclipdb into such a shared folder. iClip will notice if the Clippings database has been synchronized from another Mac and will then reload the database automatically.
To move or copy the database to your shared folder, locate the database file first, e.g. by using the "Reveal Clippings Database" command from the iClip menu button. Place iClip Clippings.iclipdb into the shared folder, then double click it. iClip will then ask if you like to open it temporarily or permanently. Choose Use Permanently. Once the file has been synchronized to your other Macs, double click and choose Use Permanently there, too. Now, whenever you add or modify a clipping on one Mac, a few seconds later the clippings should update on your other Mac(s) as well. Just be careful not to make changes on the other Mac before that Mac has synchronized the changes, or you'll lose the change again as it'll get overwritten by the other computer.
Note that this will not work with iCloud because Apple's service tried to be smarter, which defies the simple expectations that iClip makes about the file getting replaced by a newer version through the sharing service.
Scripting iClip with AppleScript or Javascript
iClip is scriptable. Scripting can be used to gather Clippings, modify them, add new ones, and more.
Furthermore, you can install so-called Action Scripts. They operate on single clippings and are accessible through the action menu, e.g. when you right-click on a clipping or use a bin's gear button. To install such scripts, they need to placed into a folder named Scripts inside your home's Library/Application Support/iClip folder. iClip will then detect them within about 2 seconds - there's no need to relaunch iClip.
A special Action Script named iClip Events.scpt is able to post-process any newly added scripts, enabling special handling such as adding extra information or fixing issues with misbehaving applications.
To learn more about all these abilities and find useful scripts other users have created, visit the iClip Scripting web page online.
System Services
Services are a system wide plug-in architecture for providing operations on selected content. When you right-click on a clipping or use a bin's gear icon, any Services that operate on that kind of clipping (primarily text) will be listed under the Services menu.
Shortcuts and Power User Functions
Copying
If you hold the Option (⌥) key while clicking a Copy button, iClip simply retrieves the current Clipboard contents into the clip bin, without copying from the current application first.
Pasting
If you hold the Option (⌥) key while clicking a Paste button, iClip places the contents of the clip bin into the Clipboard, without pasting to the current application afterward.
If you hold the Command (⌘) key while clicking a Paste button, iClip pastes the bin contents as plain text, i.e. it removes any formatting from it.
If you hold the Shift (⇧) key or Shift and Command keys while clicking a Paste button, iClip will clear the bin after pasting.
If you hold the Shift and Option keys while clicking a Paste button, iClip pastes the text from all bins of the current Clip Set combined.
If you hold the Option key while clicking on the iClip icon (![]() ) in the menu bar, iClip initiates a Hot Key Paste operation, letting you choose the bin to paste, after which iClip will hide again if it was hidden before. And if you additionally hold down the Shift (⇧) key, it'll invoke the Multiple Paste mode, which will remain active until you type the Esc key.
) in the menu bar, iClip initiates a Hot Key Paste operation, letting you choose the bin to paste, after which iClip will hide again if it was hidden before. And if you additionally hold down the Shift (⇧) key, it'll invoke the Multiple Paste mode, which will remain active until you type the Esc key.
Dragging from or into Bins
When dragging a clipping from a bin to another bin, in order to duplicate the dragged clipping, hold down the Option (⌥) key.
When dragging a clipping from an application into a bin, in order to keep a previously set name for the bin intact, hold down the Ctrl key right before dropping the dragged content into the bin.
When dragging a clipping from an application onto the (+) button at iClip's bottom or right end, in order to store multiple items in a single bin, hold down the Shift (⇧) key right before dropping the dragged content into the bin.
When dragging a clipping containing text from a bin to an application, in order to drag only the plain text portion of the clipping, hold down the Command (⌘) key at the start of the drag operation, then let go of the key.
When dragging a text clipping from a bin to the Finder, in order to create a text file (.txt or .rtf) instead of a .textClipping file, hold down the Option (⌥) key at the start of the drag operation, then let go of the key.
Adding or removing Bins
You can add or remove multiple clip bins by pressing Option (⌥) while clicking the Add Clip Bin or Remove Clip Bin buttons. Doing so opens a dialog that allows you to choose the number of clip bins to add or remove.
Editing Clippings
When editing a clipping's name, pressing the Tab key or cmd+S toggles the Show name checkbox on and off.
Accessing Original Files
If the Option (⌥) key is held down when the bin's action menu is opened, the Open Original File With menu will show the full paths of every app that appears in the menu list.
When an app is selected from the Open Original File With menu with the Command key held down, the file is not opened with the app but instead the app gets revealed in the Finder.
Editing a Smart Search
Holding down the Option (⌥) key changes the Save button to Save As…, allowing you to save a copy of the search under a new name.
Clip Set Switching
If you hold the Shift (⇧) key while clicking the up or down buttons in the Clip Sets Pop-up Menu, iClip will switch to the first or last clip set respectively. (Note: This feature is only available with the classic Square and Round skins, not with the Slim skin.)